

I saw candy corn in my local grocery store this past weekend, which means that fall (and Halloween) are coming! so I don’t think it’s too early to start making some of these super cute treat boxes!


I made this box using a basic design by another demonstrator, Angie Juda,, but hers were much taller. I thought this design would work for something smaller, so I set about re-sizing it so that it’s now the perfect size to put in little “snack” size M&M’s or it will actually fit 2! snack size candy bars!

I was also looking for a way to use the new Magic in This Night Designer Series Paper. There are alot of “spooky designs” with spiders and bats and also some black & white flowers that are a little on the macabre side.

The finished size of the box is approximately 3″ wide x 3 1/2″ tall. It is super easy to make and could easily be adapted for any occasion….in fact I see some Christmas Stocking stuffers in the future! Here is the cutting and scoring diagram:


And if you follow these simple directions…..
- The top is the long side with the 2 score lines, the bottom has 1 score line
- From the bottom, cut up on the vertical score lines until you get to the horizontal score
line. - Cut away the pieces marked in black (two “pie slices” from each side of the skinny flaps,and remove the small flap on the right side)
- Turn your cardstock upside down so the top is now at the bottom.
- Cut up on the vertical score lines until you get to the SECOND horizontal score line.
- Fold the two big flaps under and then cut off the three skinny flaps even with the
SECOND horizontal line
It should look like this when you are done…..after you have adhered the Designer Series Paper & Cardstock mats. All that is left is to put either Tear & Tape or Multipurpose Liquid glue on the flap on the right and fold it around to attach to the opposite side of the box. 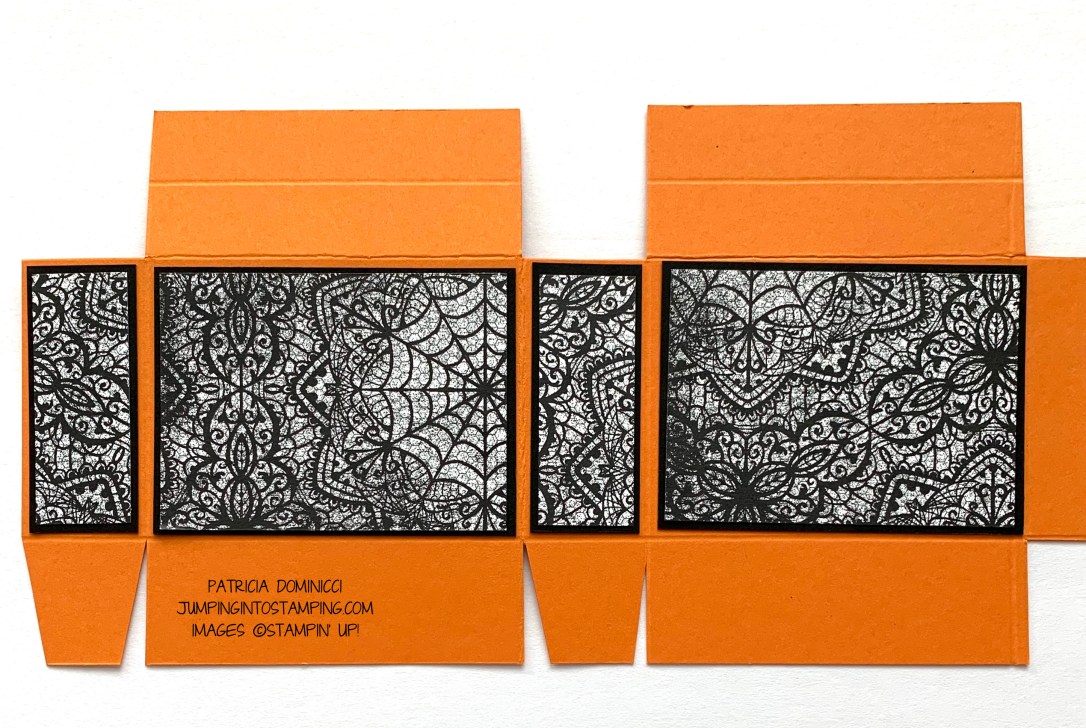


Now it’s time for fun and decorating your box. I added a ghost (Stitched Ovals Dies/Layering Ovals Scalloped Oval), a spider (Little Treats Dies ) and the word BOO (Playful Alphabet Dies). I used the “Zero” for the letter “O” because I liked the shape better. I adhered a piece of Basic Black Cardstock to one of the Foam Adhesive Sheets and then die cut the letters. The middle of the letter O was used to make the eyes of the ghost,


- Dies
- Layering Ovals (oval and Largest scalloped oval for bottom of ghost
- Little Treat Box – Spider
- Playful Alphabet for letters B O O. (Inside of O’s are ghost eyes)
- Pumpkin Pie Cardstock – Cut 4 ½” x 8 ½”
- Score on the long side at 1”, 4”, 5” and 8”
- Score on the short side at 1”, 3 1/4” and 3 7/8“
- Cut according to diagram
- Magic in the Night Designer Series Paper.
- Cut 2 pieces – 2 ¾” x 2”
- Cut 2 pieces – ¾” x 2”
- Basic Black Cardstock
- Cut 2 pieces – 2 ⅞” x 2 ⅛”
- Cut 2 pieces – ⅞” x 2 ⅛”
- Whisper White – Scrap for Ghost – Layering Ovals Dies
- Foam Adhesive Sheets – For letters B O O (inside of O’s are Ghost eyes)
- Basic Black Cardstock – Scrap for Spider, and letters
- Metallic Mesh Ribbon – 12”
- ¼” Hole Punch
These are fun and easy to make and I can hardly wait to fill them with treats!
Happy Stamping!
Patricia


If you like fall, autumn and all things that come with cool weather….like Halloween, Pumpkins, Drinking Hot Cider, then you will love Paper Pumpkin’s September Kit – Hello Pumpkin. September’s Kit has everything you need to create cracker box treat packages for friends and family. The paper is reversible, The stamp set is for multi-occasions, and there are lots of die cuts, so you have twice as many options!
The kit contains enough supplies for 20 cracker box treat packages. The colors are Bumblebee, Basic Black, Cajun Craze, Cinnamon Cider, Mossy Meadow, Old Olive and Pumpkin Pie.
You can order your Paper Pumpkin kit HERE The Deadline to order is September 10th!
T

IF YOU NEED SUPPLIES SO YOU CAN MAKE TODAY’S PROJECT or any other crafting project, please click HERE and you’ll be taken to my online Stampin’ Up! Site where you can look at all the products online and purchase what you need.
If you do not already have a demonstrator, I would be honored to be yours! If your order is less than $150, please use my AUGUST Host Code: QTYPTEBZ and choose me as your Demonstrator when prompted.

If you place an order of $50 or more and use my Host Code during the month of August. I will send you a small gift as a thank you from me!
If your order is $150 or more, please do NOT use the Host Code as you will receive Stampin’ Rewards of your own. Rewards start at $15 worth of free products of your choice. Don’t forget to choose me as your demonstrator during check-out so you can receive your gift from me!
Need Help Placing an Order? please contact me at pdominicci@gmail.com and I will be happy to assist you!
Just want to know what I used today? Click on any item and it will take you to my Stampin’ Up Online Site where you can purchase these items or get more product information.
 |
|||
 |
 |
 |
|
 |
 |
 |


